Video ads for websites: Creating AD Codes
Step 1. Sign up to join OnClickA Publishers: Sign up →
Step 2. Go to the AD Codes tab: AD Codes →
Step 3. Add new AD Code
Step 4. Copy the snippet
Step 5. Paste the snippet from a clipboard to head / to body of your website
Now, let’s get more details about each of the steps.
Step 1
Sign up to OnClickA Publishers. You can do it here:
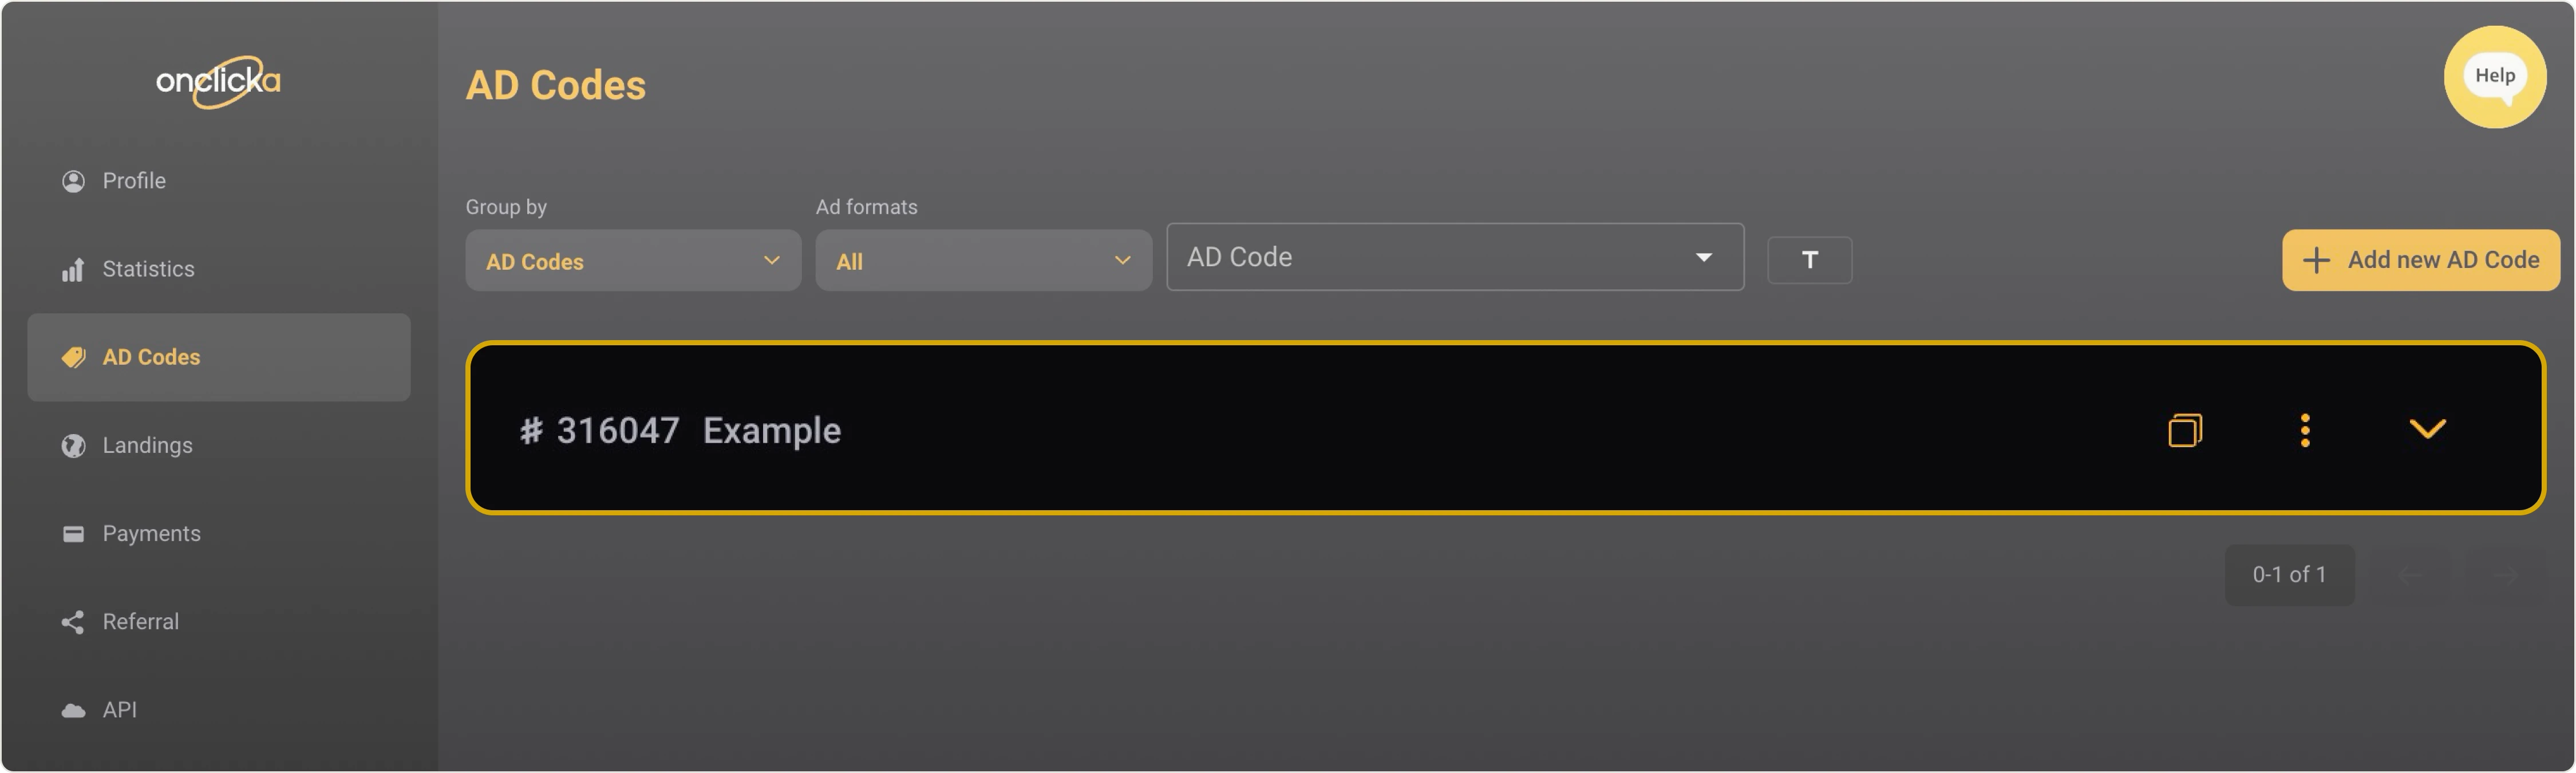
Step 2
Go to the AD Codes tab:
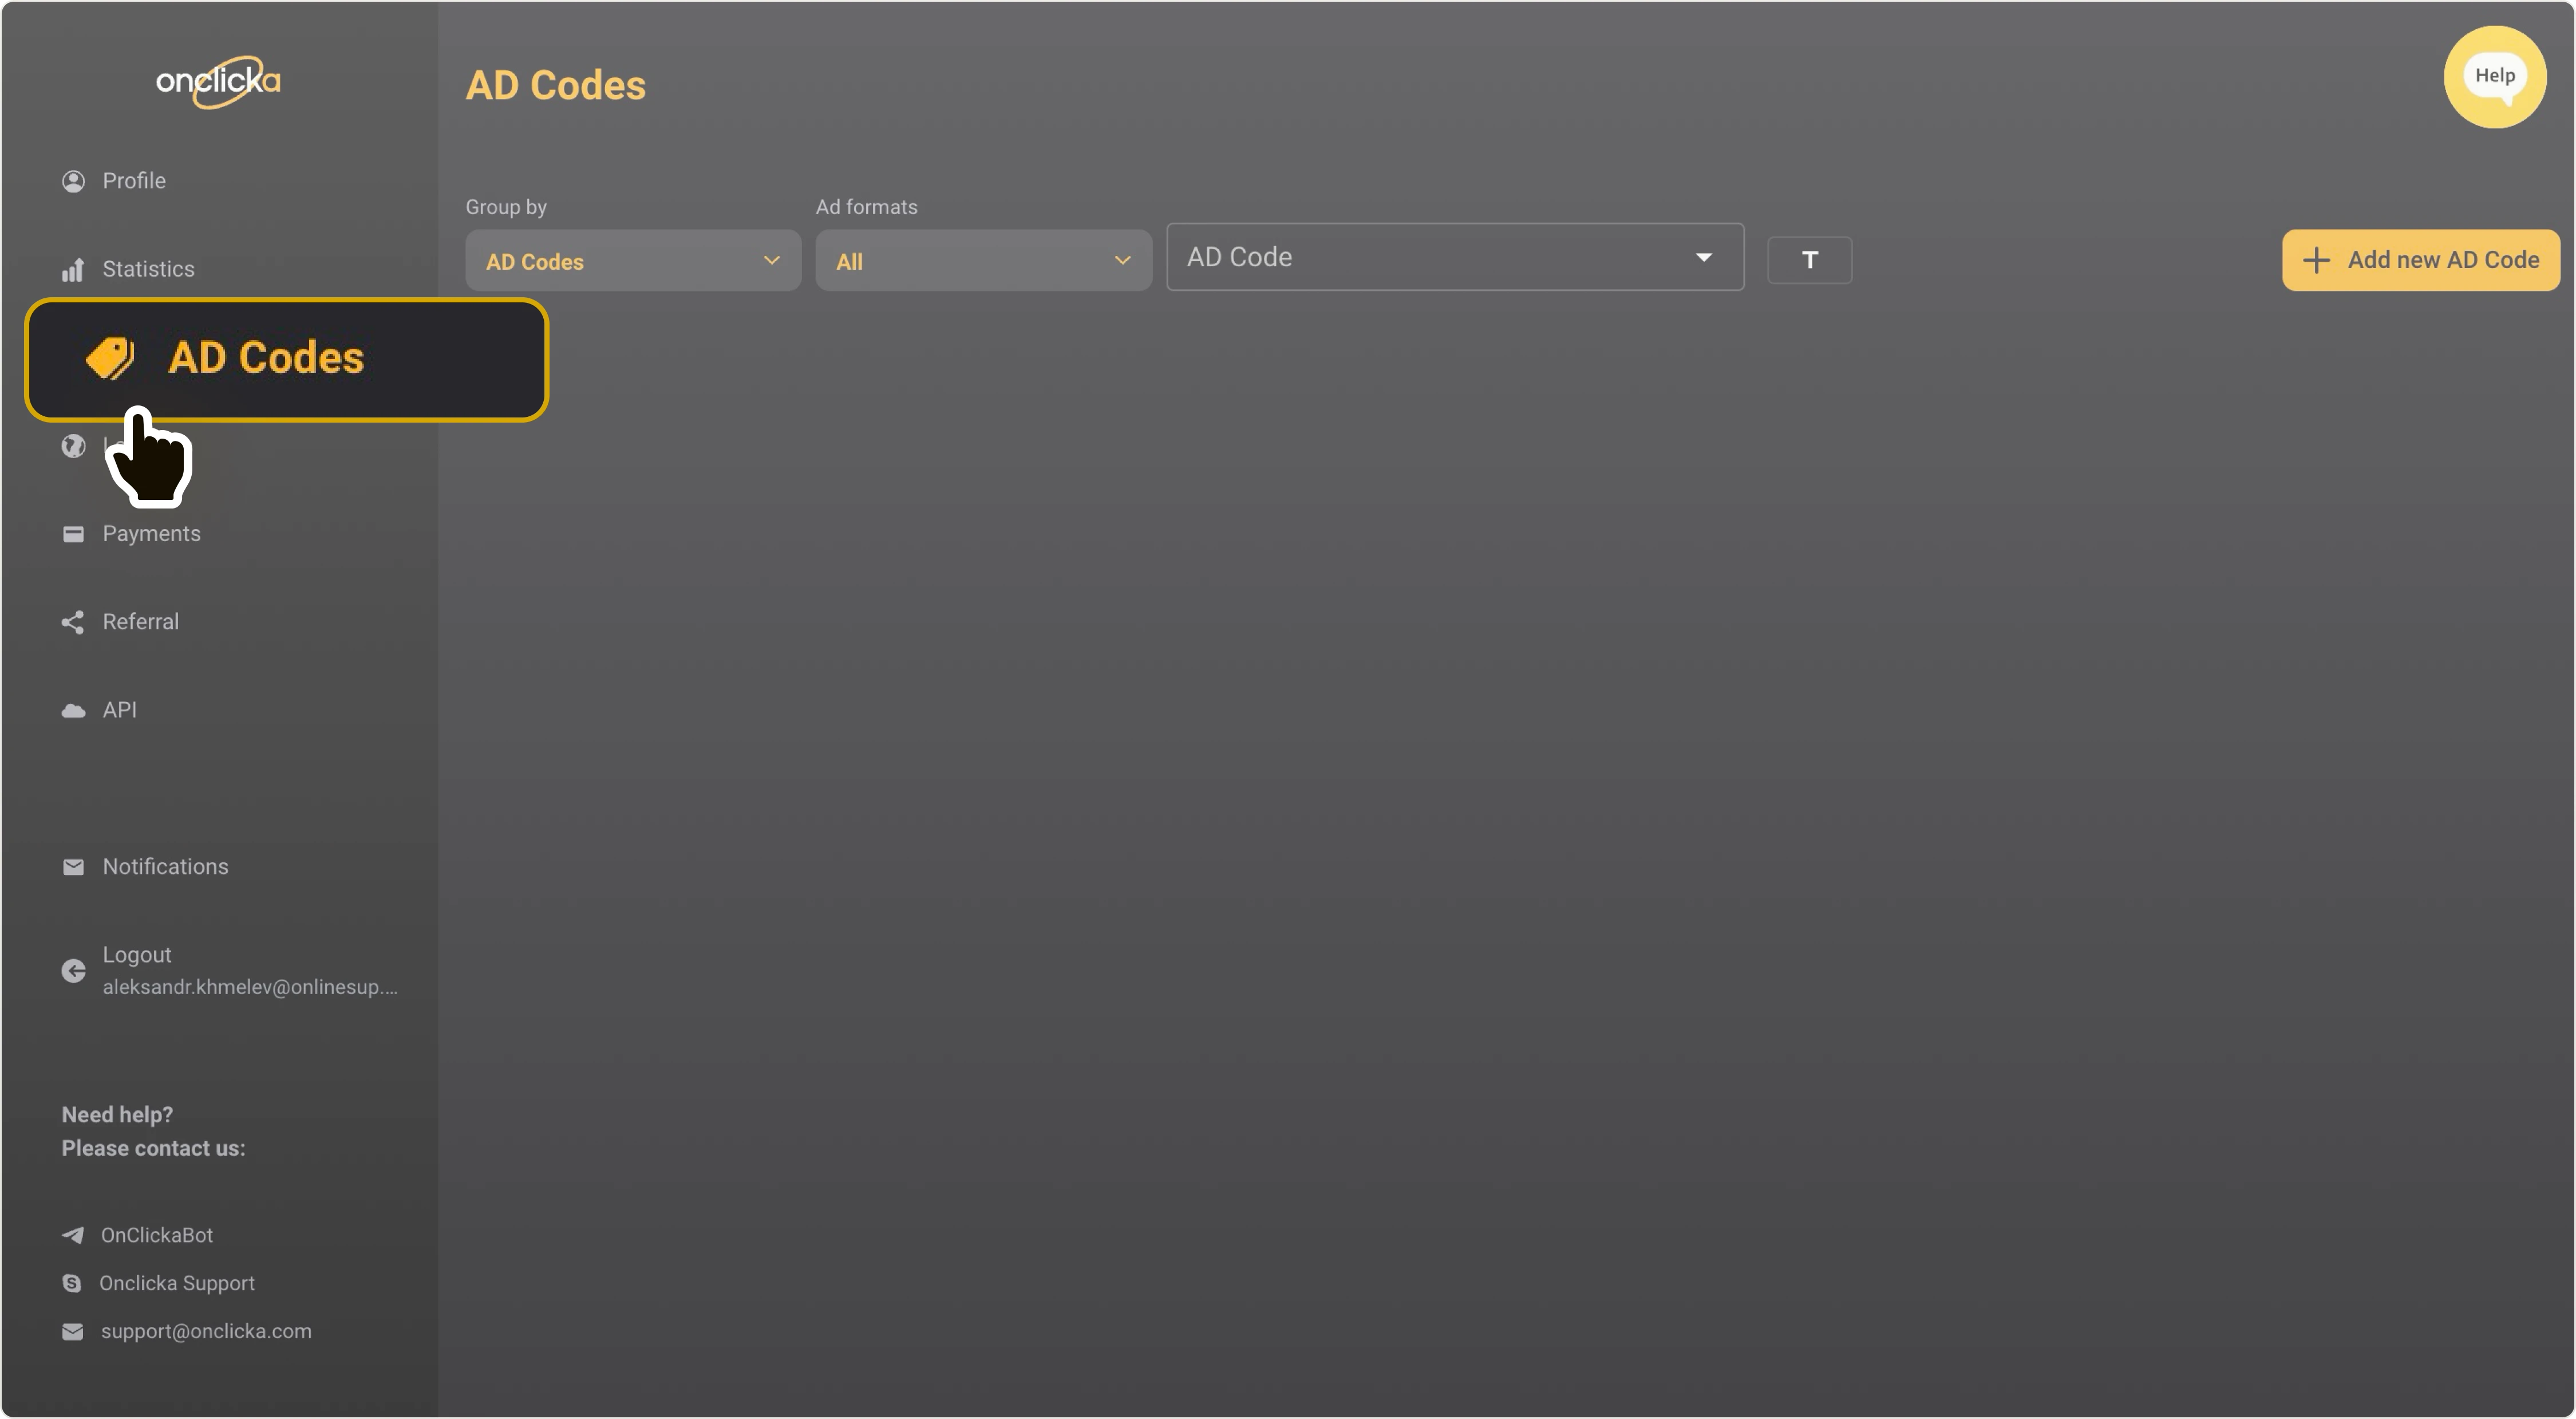
Step 3
Click on Add new AD Code:

Create new AD Code:
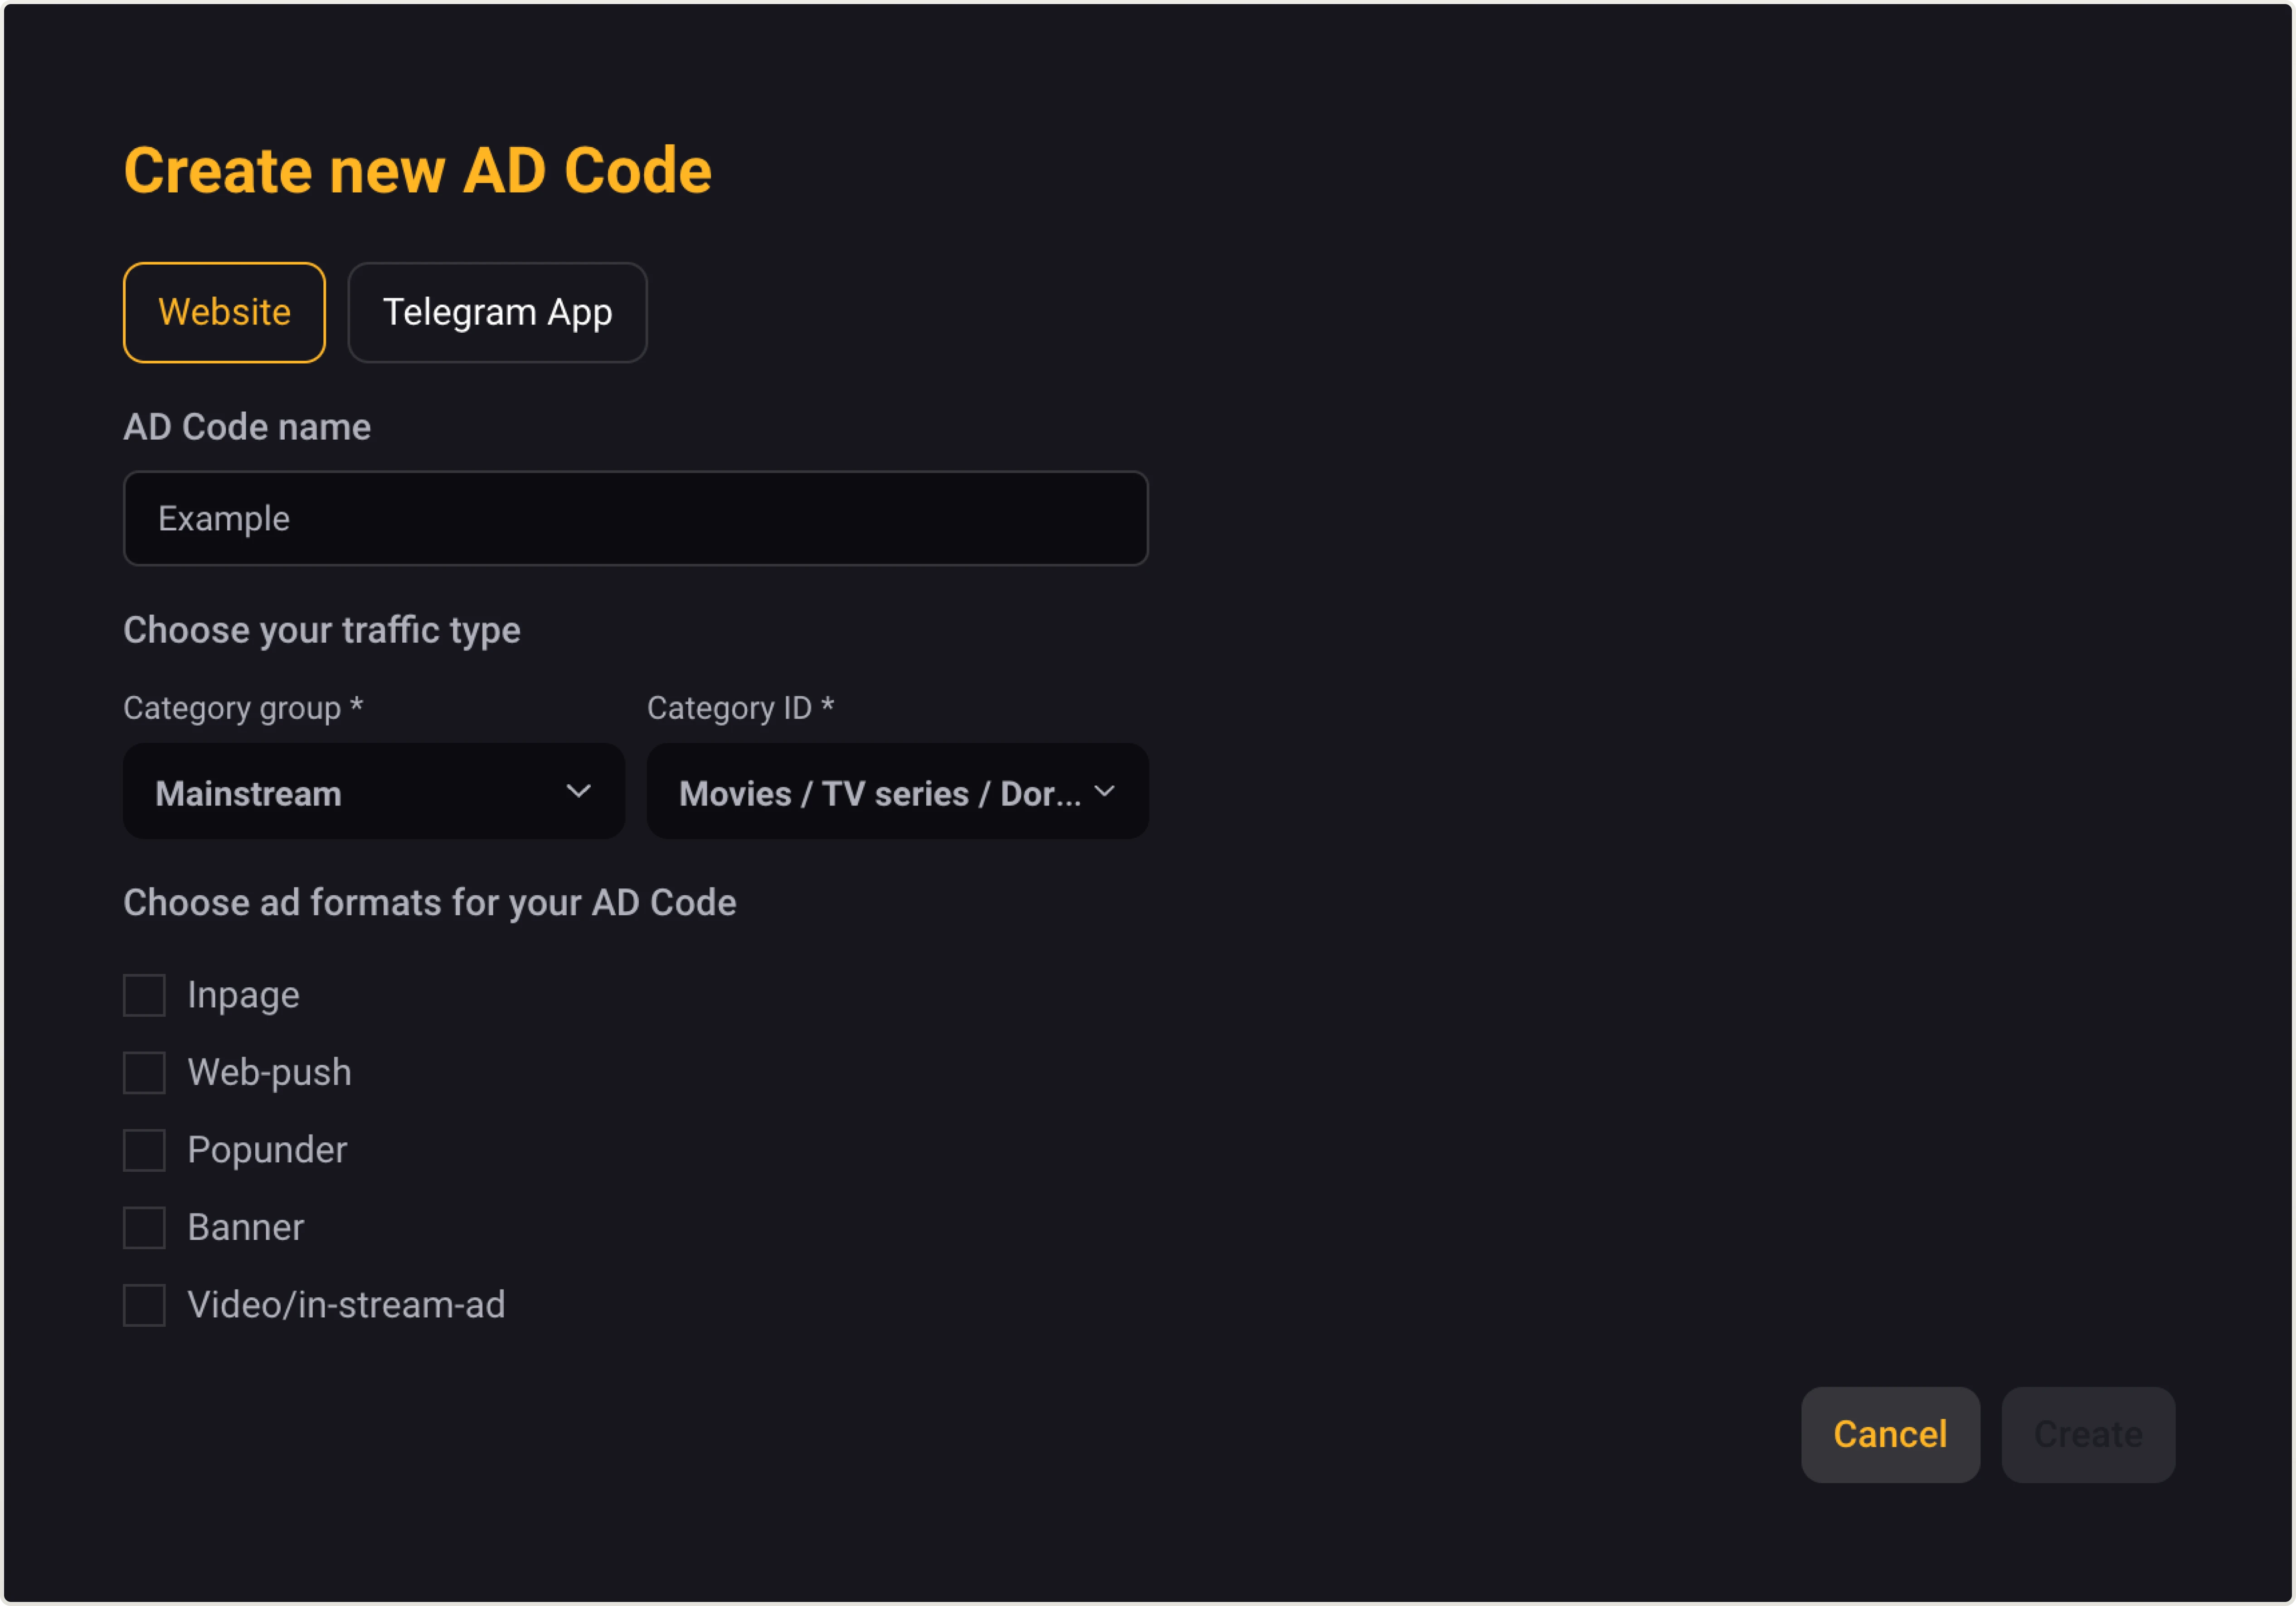
ℹ️ AD Code name
Provide a name for your ad code. This name will only be viewed within our service to help you differentiate one code from another.
ℹ️ Choose your traffic type
It’s essential to select Category group and Category ID. Choose the category that best suits your needs.
ℹ️ Choose ad formats for your AD Code
Choose the Video/in-stream-ad option since this guide is about Video.
Let’s explore more potential customizations.
Please note
Some ℹ️ customizations are marked as Optional. They provide more control but aren’t needed in most cases—ads will display fine without them.
Enable them only if you’re sure you need them.
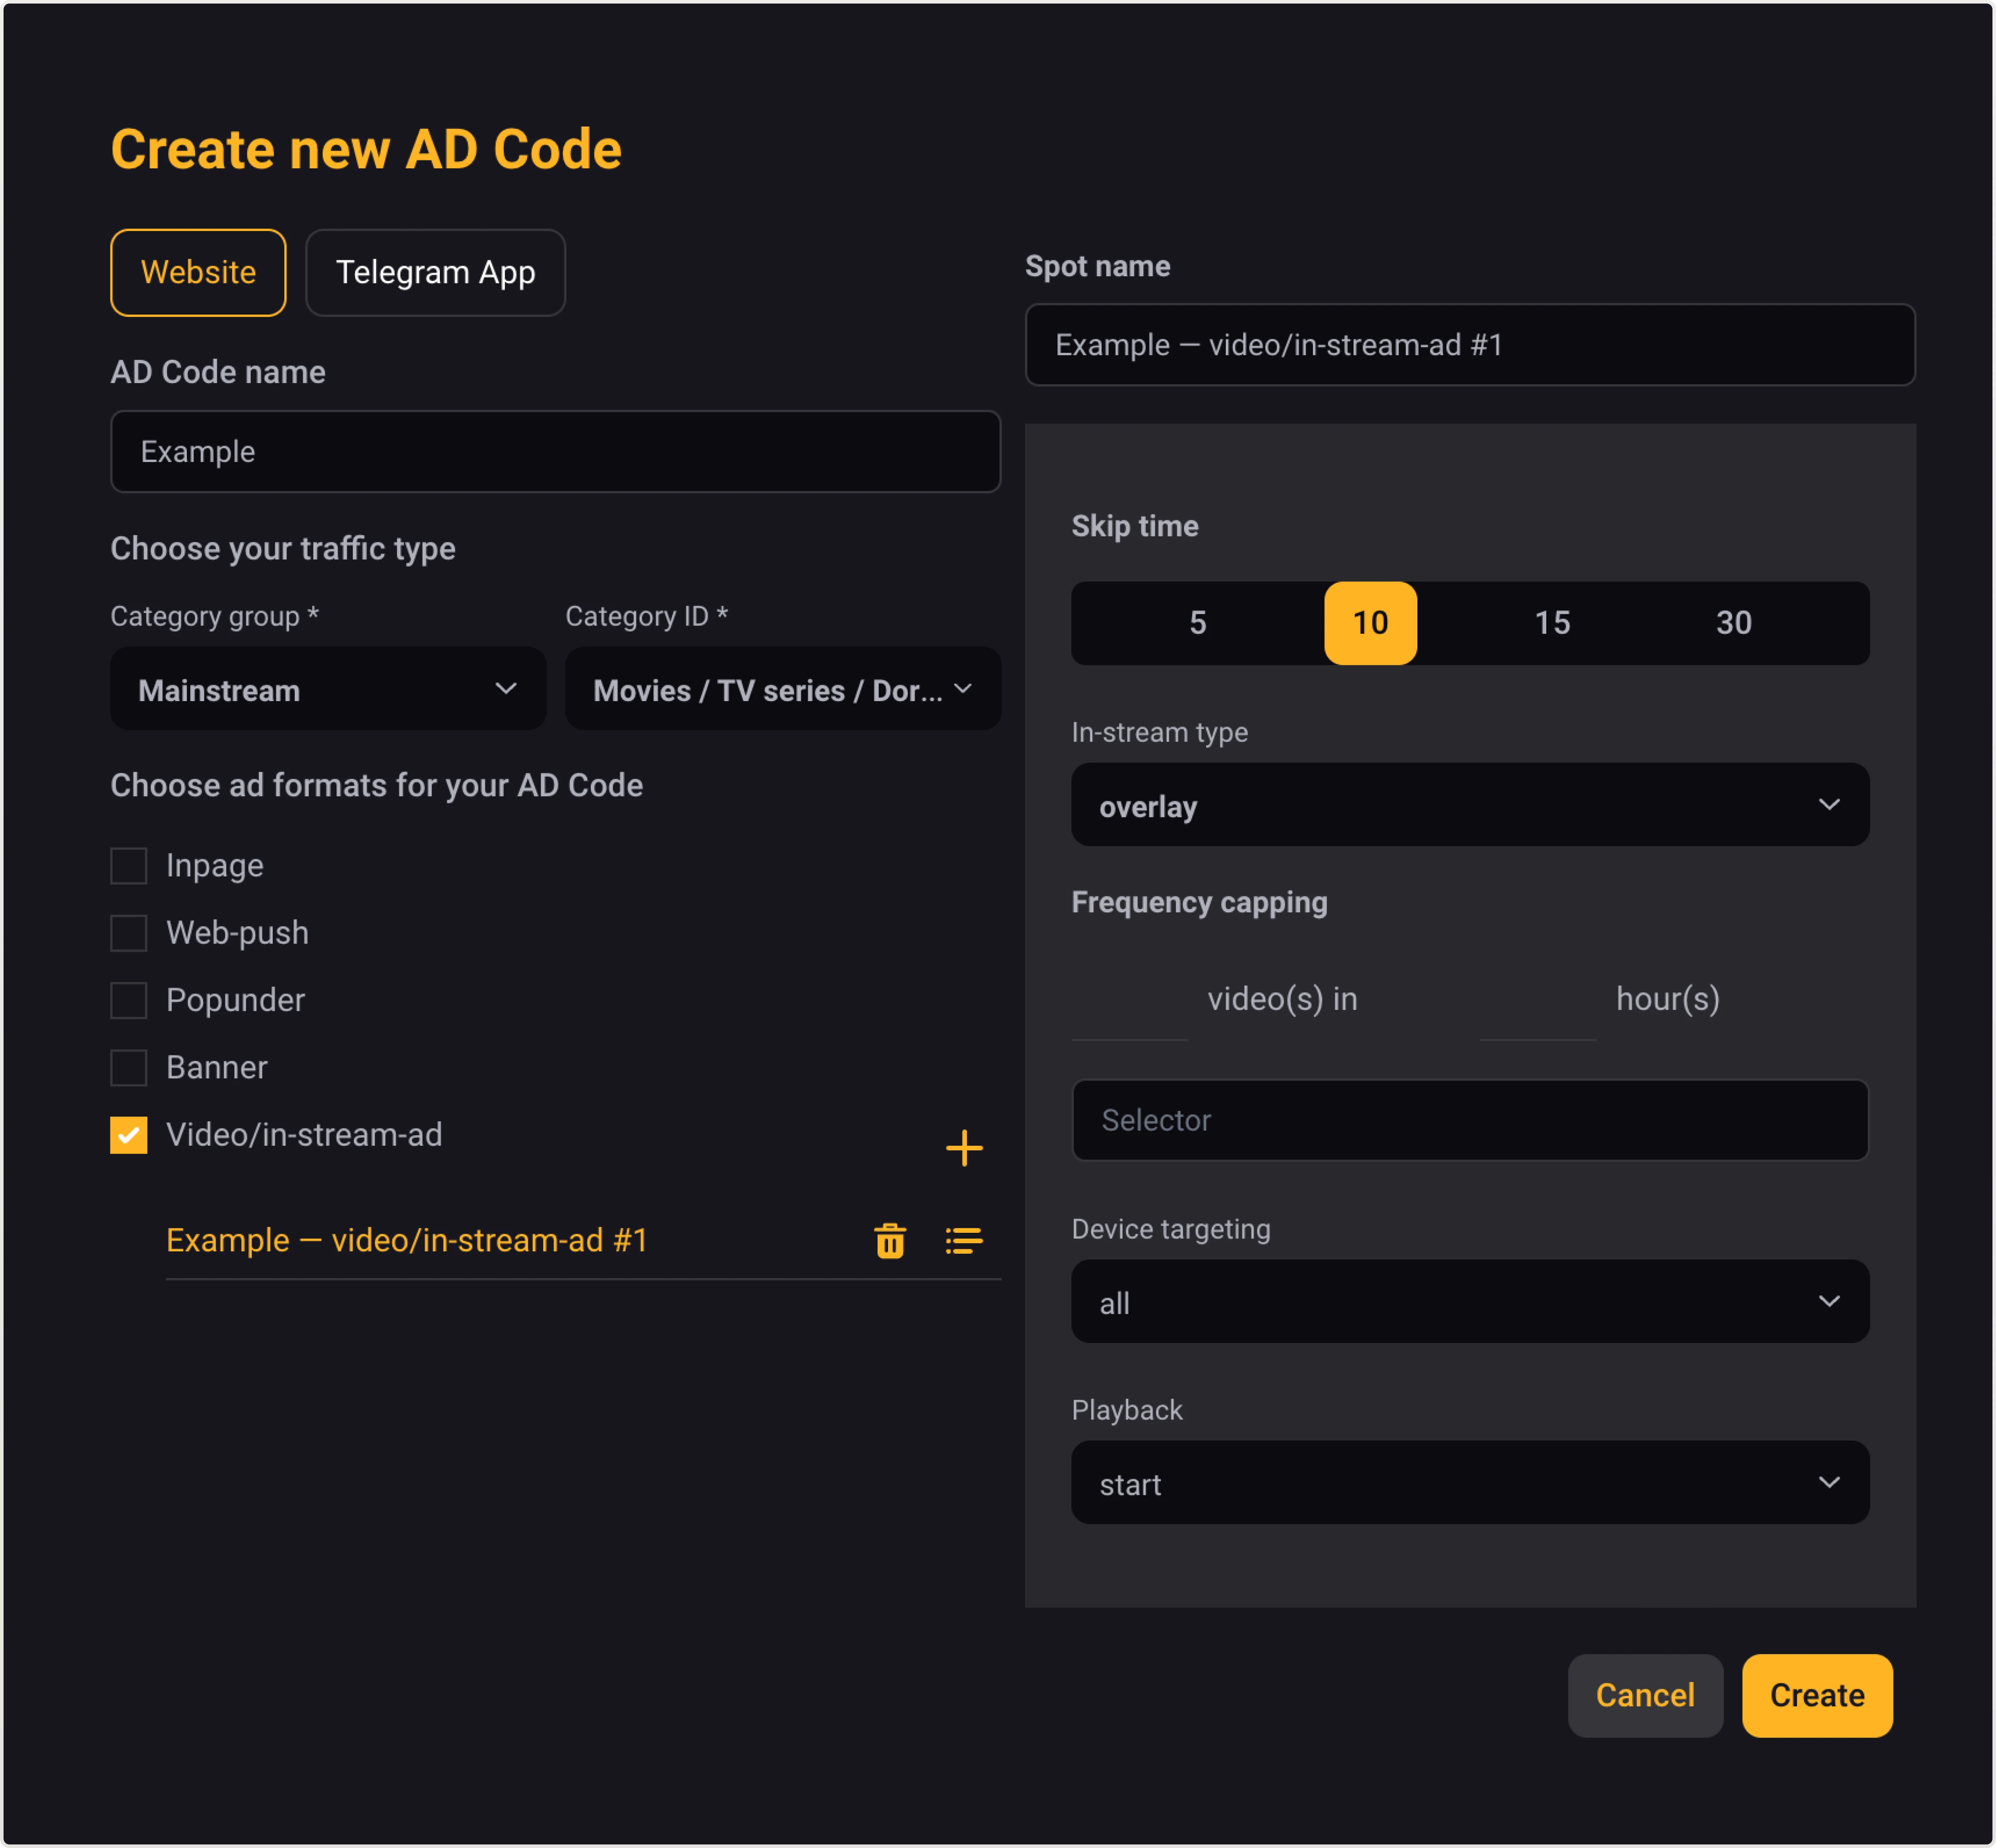
ℹ️ Spot name
Spot name is filled in automatically.
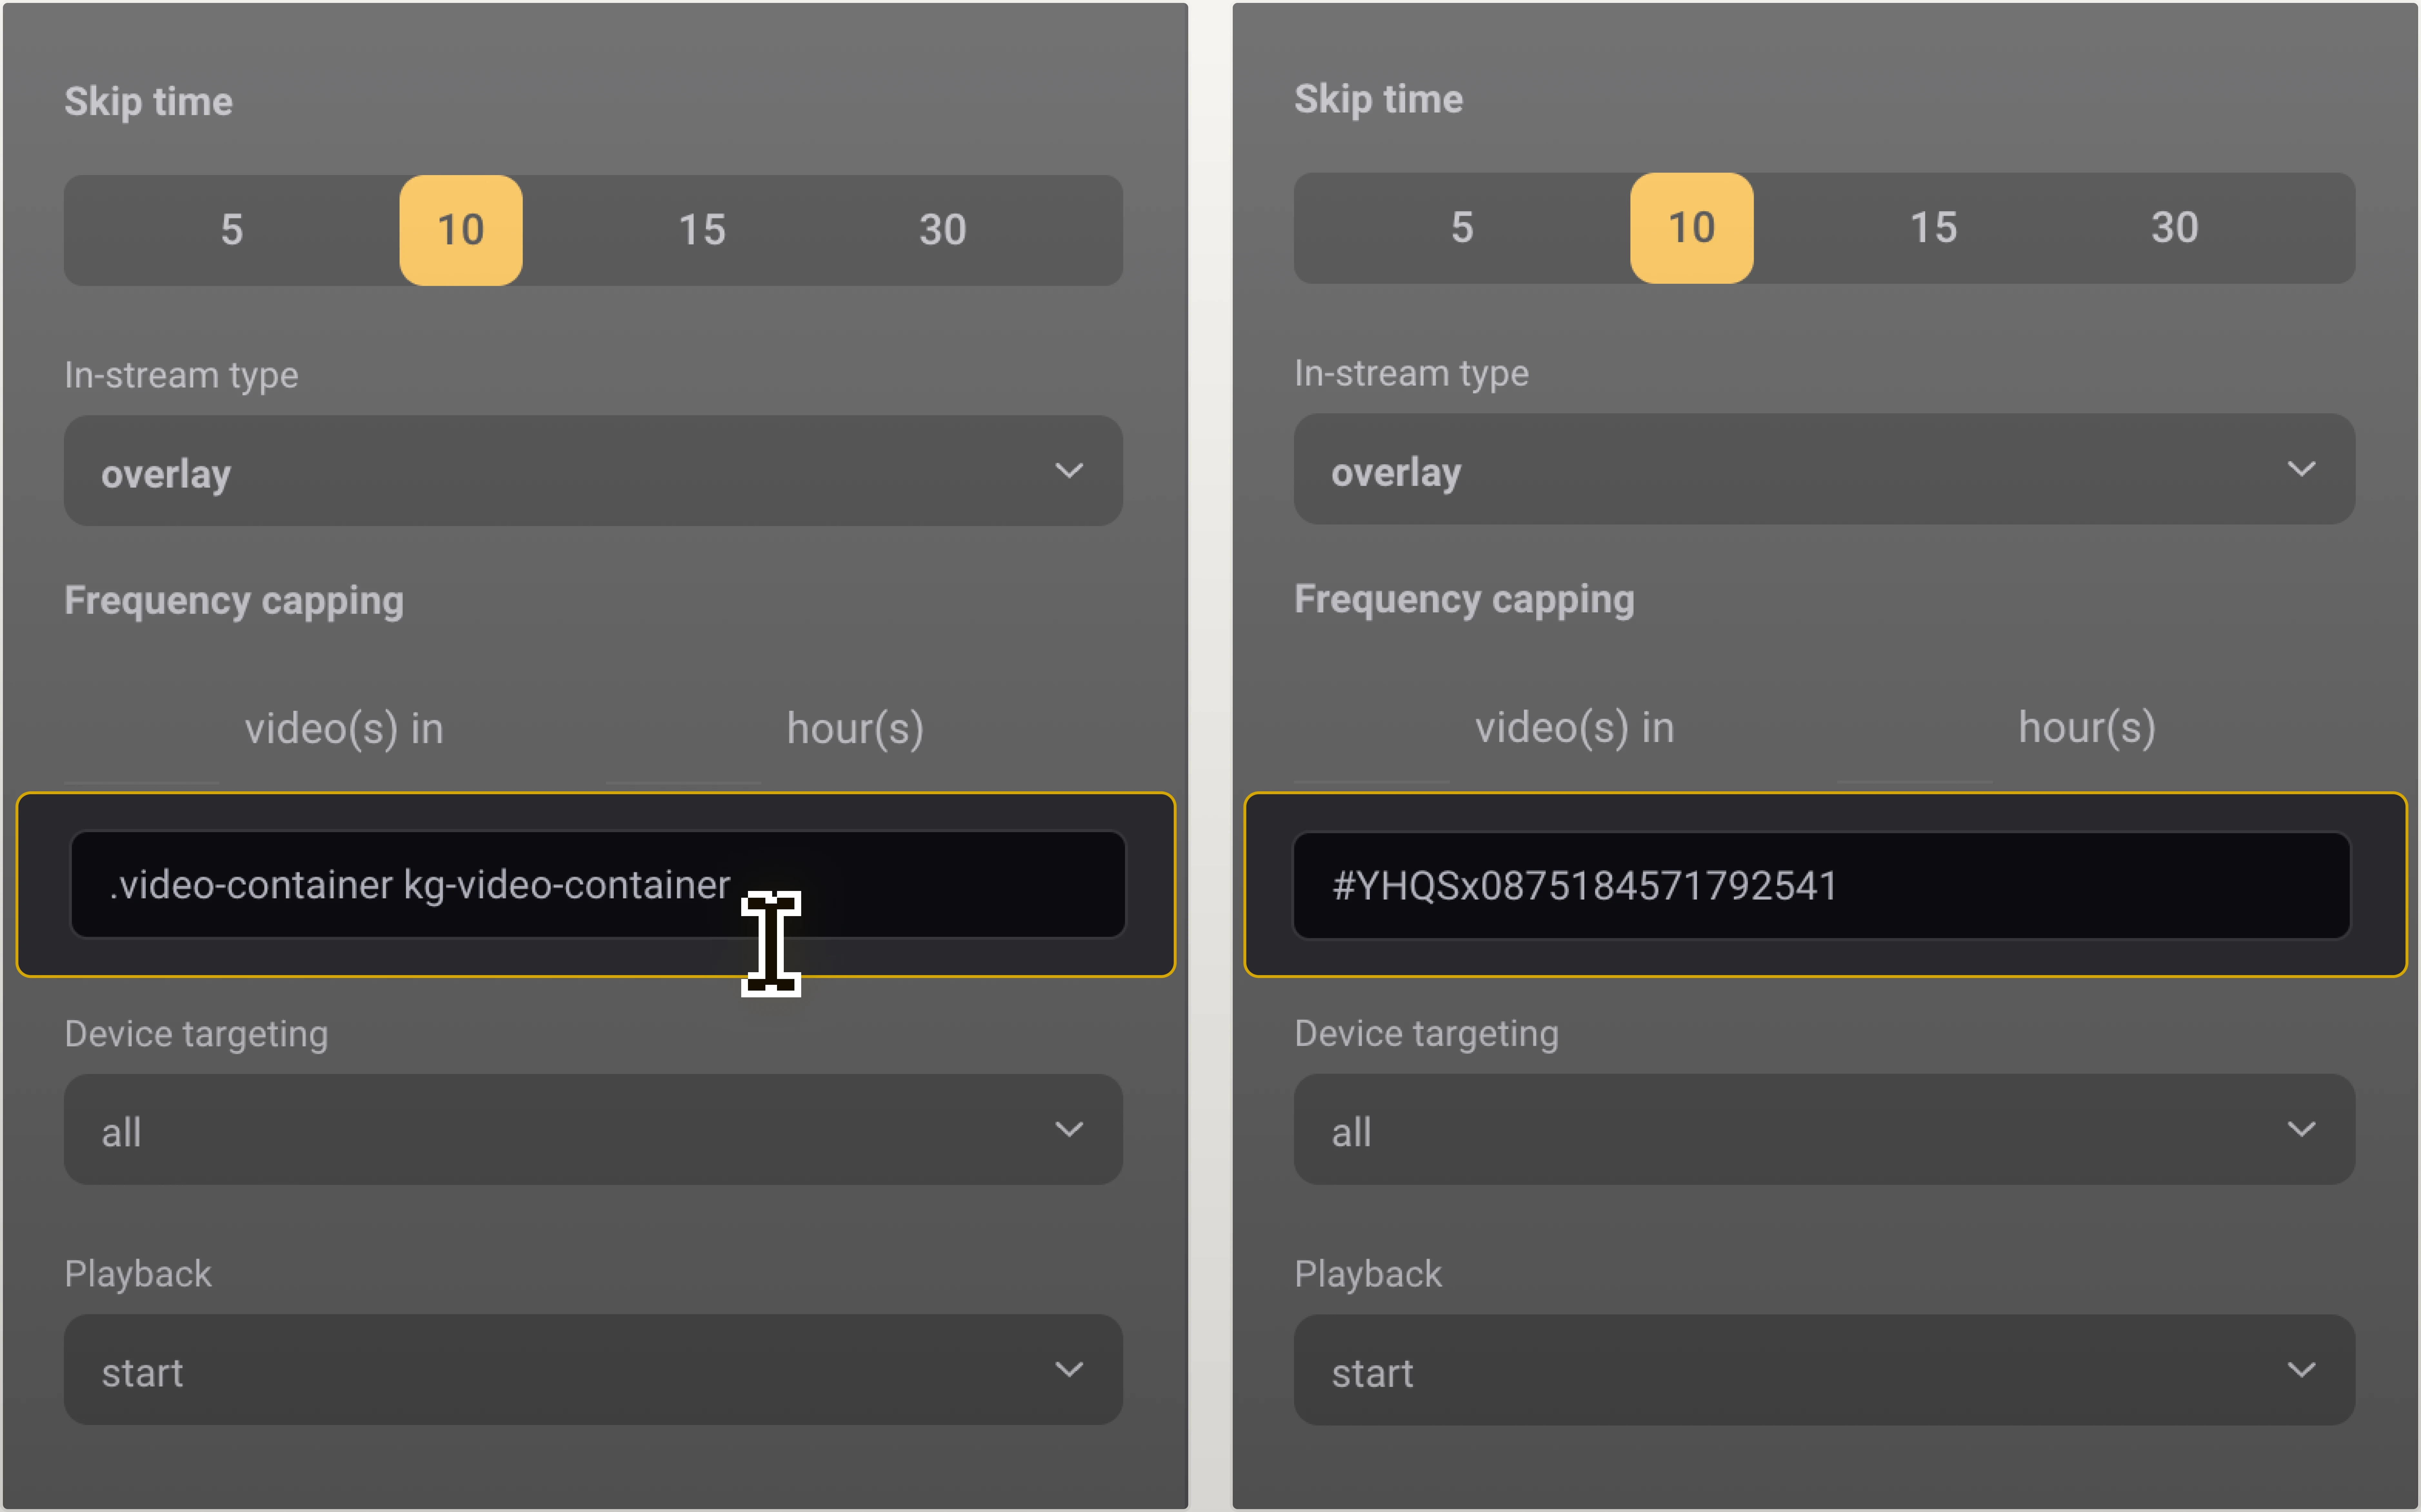
ℹ️ Skip time
It’s best to establish a minimum skip duration of 10 because it has a direct impact on traffic volume. If it is lower, there will be less traffic and money for both sides. While it is preferable to have more.
ℹ️ In-stream type
Choose between in-stream, overlay, out-stream, and slider.

In-stream ads are played directly on the player on the website.
You can read about optional settings—Frequency capping and Device targeting—lower.

Overlay is set by default. Overlay ads are used for in-stream placement realization, but they work differently since they overlay the original player of the website.
ℹ️ Selector: You can read about it lower.
ℹ️ Playback · Optional: Select when to display the advertisement:
· at the Start of the video,
· when the user Pauses the video,
· at the End of the video.

Out-stream ads are displayed as banners on both mobile and desktop web pages, and are located outside of the video player.
ℹ️ Height percent · Optional: Recommended height percent is 25–30%.
ℹ️ Frequency capping · Optional: You can read about it lower.
ℹ️ Insertion method · Optional: Choose when an ad appears:
· Before watching some content,
· After watching some content,
· Inside / during watching some content
ℹ️ Selector: You can read about it lower.
ℹ️ Close button delay · Optional: Specify the number of seconds after which the close button should appear.
ℹ️ Brand info · Optional: If selected, an “ads by OnClickA” label will appear above the ad on your website.
ℹ️ Fly roll · Optional: Keeps the video ad visible while users scroll—the video ad moves to the corner of the screen and looks like a Slider.
ℹ️ Repeatable · Optional: Replays the video in a loop.

Slider is a form of out-stream advertising that is not connected to the content of the website, but instead it is linked to the user’s screen.
ℹ️ Height percent · Optional: Recommended height percent is 25–30%.
ℹ️ Slider position · Optional: You can position the slider on the desired side of the web browser window.
ℹ️ Close button delay · Optional: You can specify the number of seconds after which the close button should appear.
ℹ️ Brand info · Optional: If selected, an “ads by OnClickA” label will appear above the ad on your website.
ℹ️ Repeatable · Optional: Replays the video in a loop.
ℹ️ Frequency capping · Optional
Frequency capping determines how many videos are shown within a certain timeframe. This setting may be something to explore after you become more familiar with the platform.
ℹ️ Device targeting · Optional
You can leave it as all devices, or you can choose between desktop and mobile.
ℹ️ Selector
Only needed for Out-stream and Overlay formats. Use the Selector field to specify the exact location on your website where the ad should appear—enter the class or ID of it.
How to find the class or ID? It’s similar for both Out-stream and Overlay ads. Let’s look at an example for the Overlay ad.
The Overlay is typically placed over your website’s original player. The selector is the element where the Overlay will appear.
Here’s how to find the Overlay selector using Chrome Developer Tools:
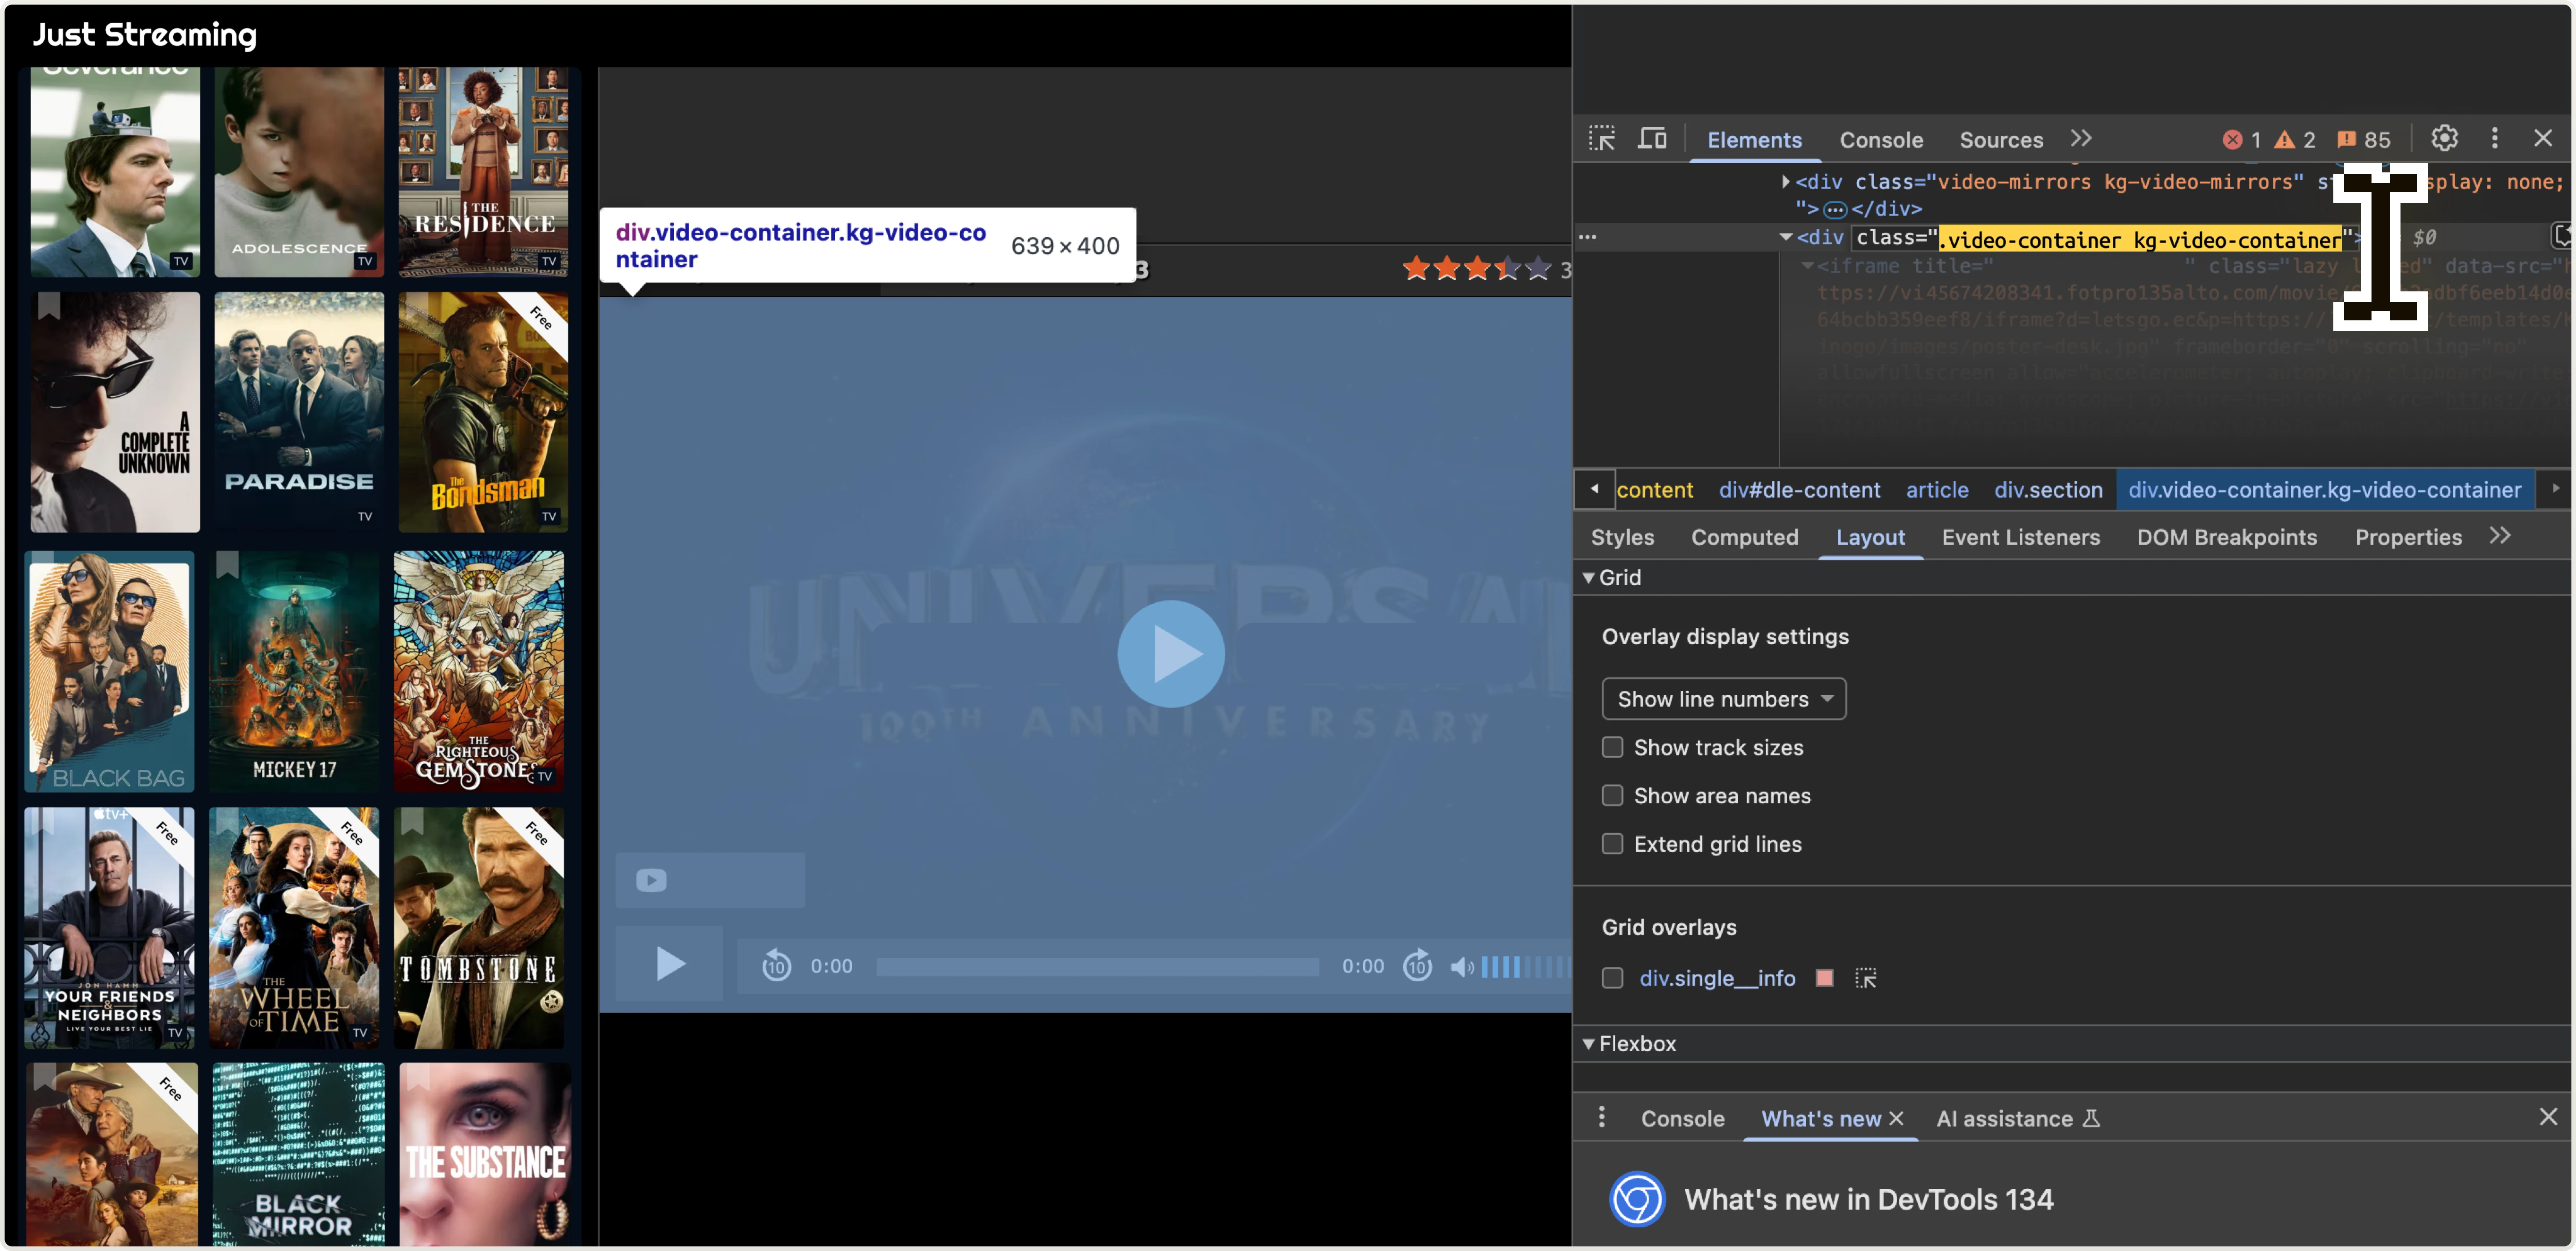
The selector is highlighted on the DevTools panel on the right:
class=".video-container kg-video-container".
Thus, the selector for this example is: .video-container kg-video-container.
It can look different, though:
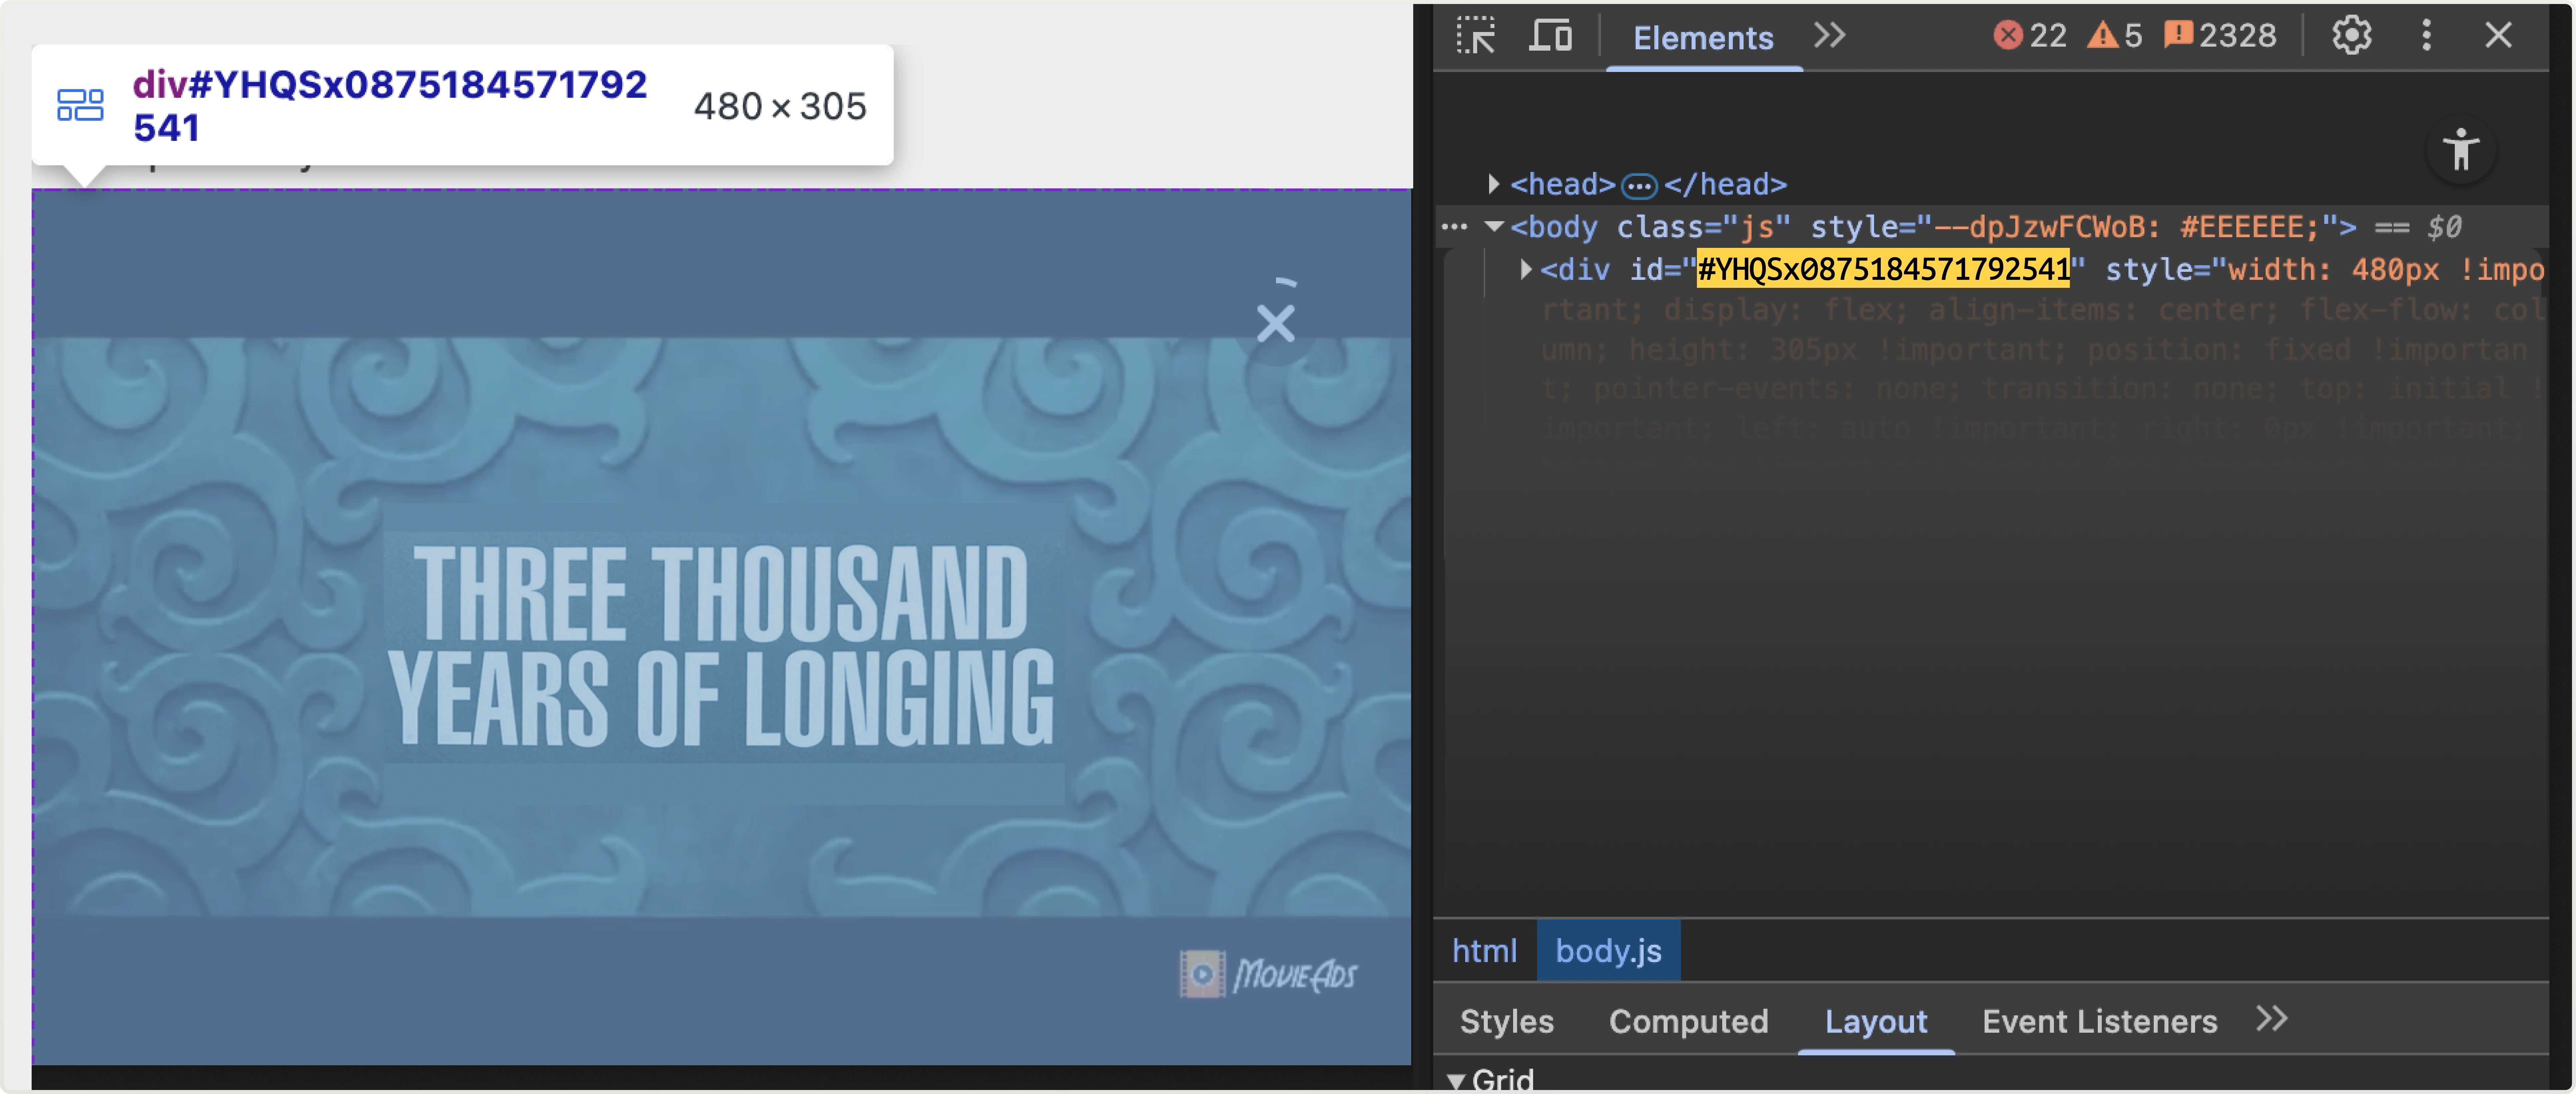
In this example, the highlighted part goes after ID:
id="#YHQSx0875184571792541".
Thus, the selector for this example is: #YHQSx0875184571792541.
Using the right prefix: .class VS #id
Your website can content either Class or ID selectors–this depends on how the website was coded. A class selector (.class) applies to any element with that class, while an ID selector (#id) targets only the specific element with that exact ID. Since classes and IDs look differently, please follow these rules when filling in the Selector field:
- When you have a class in your website’s code, you need to start the selector with a dot: .
- If there is an ID in the code, you need to start the selector with a hash: #
Both class and ID selectors are fine for either Out-stream or Overlay ads.
Now let’s copy our selector and paste it to the Selector field:
Moving on
And that’s what you could set within Video/in-stream ads if you wanted to modify it.
After it’s done, click on Create:

Your AD Code is created:
Step 4
Click on Copy snippet:

Click on Copy script:
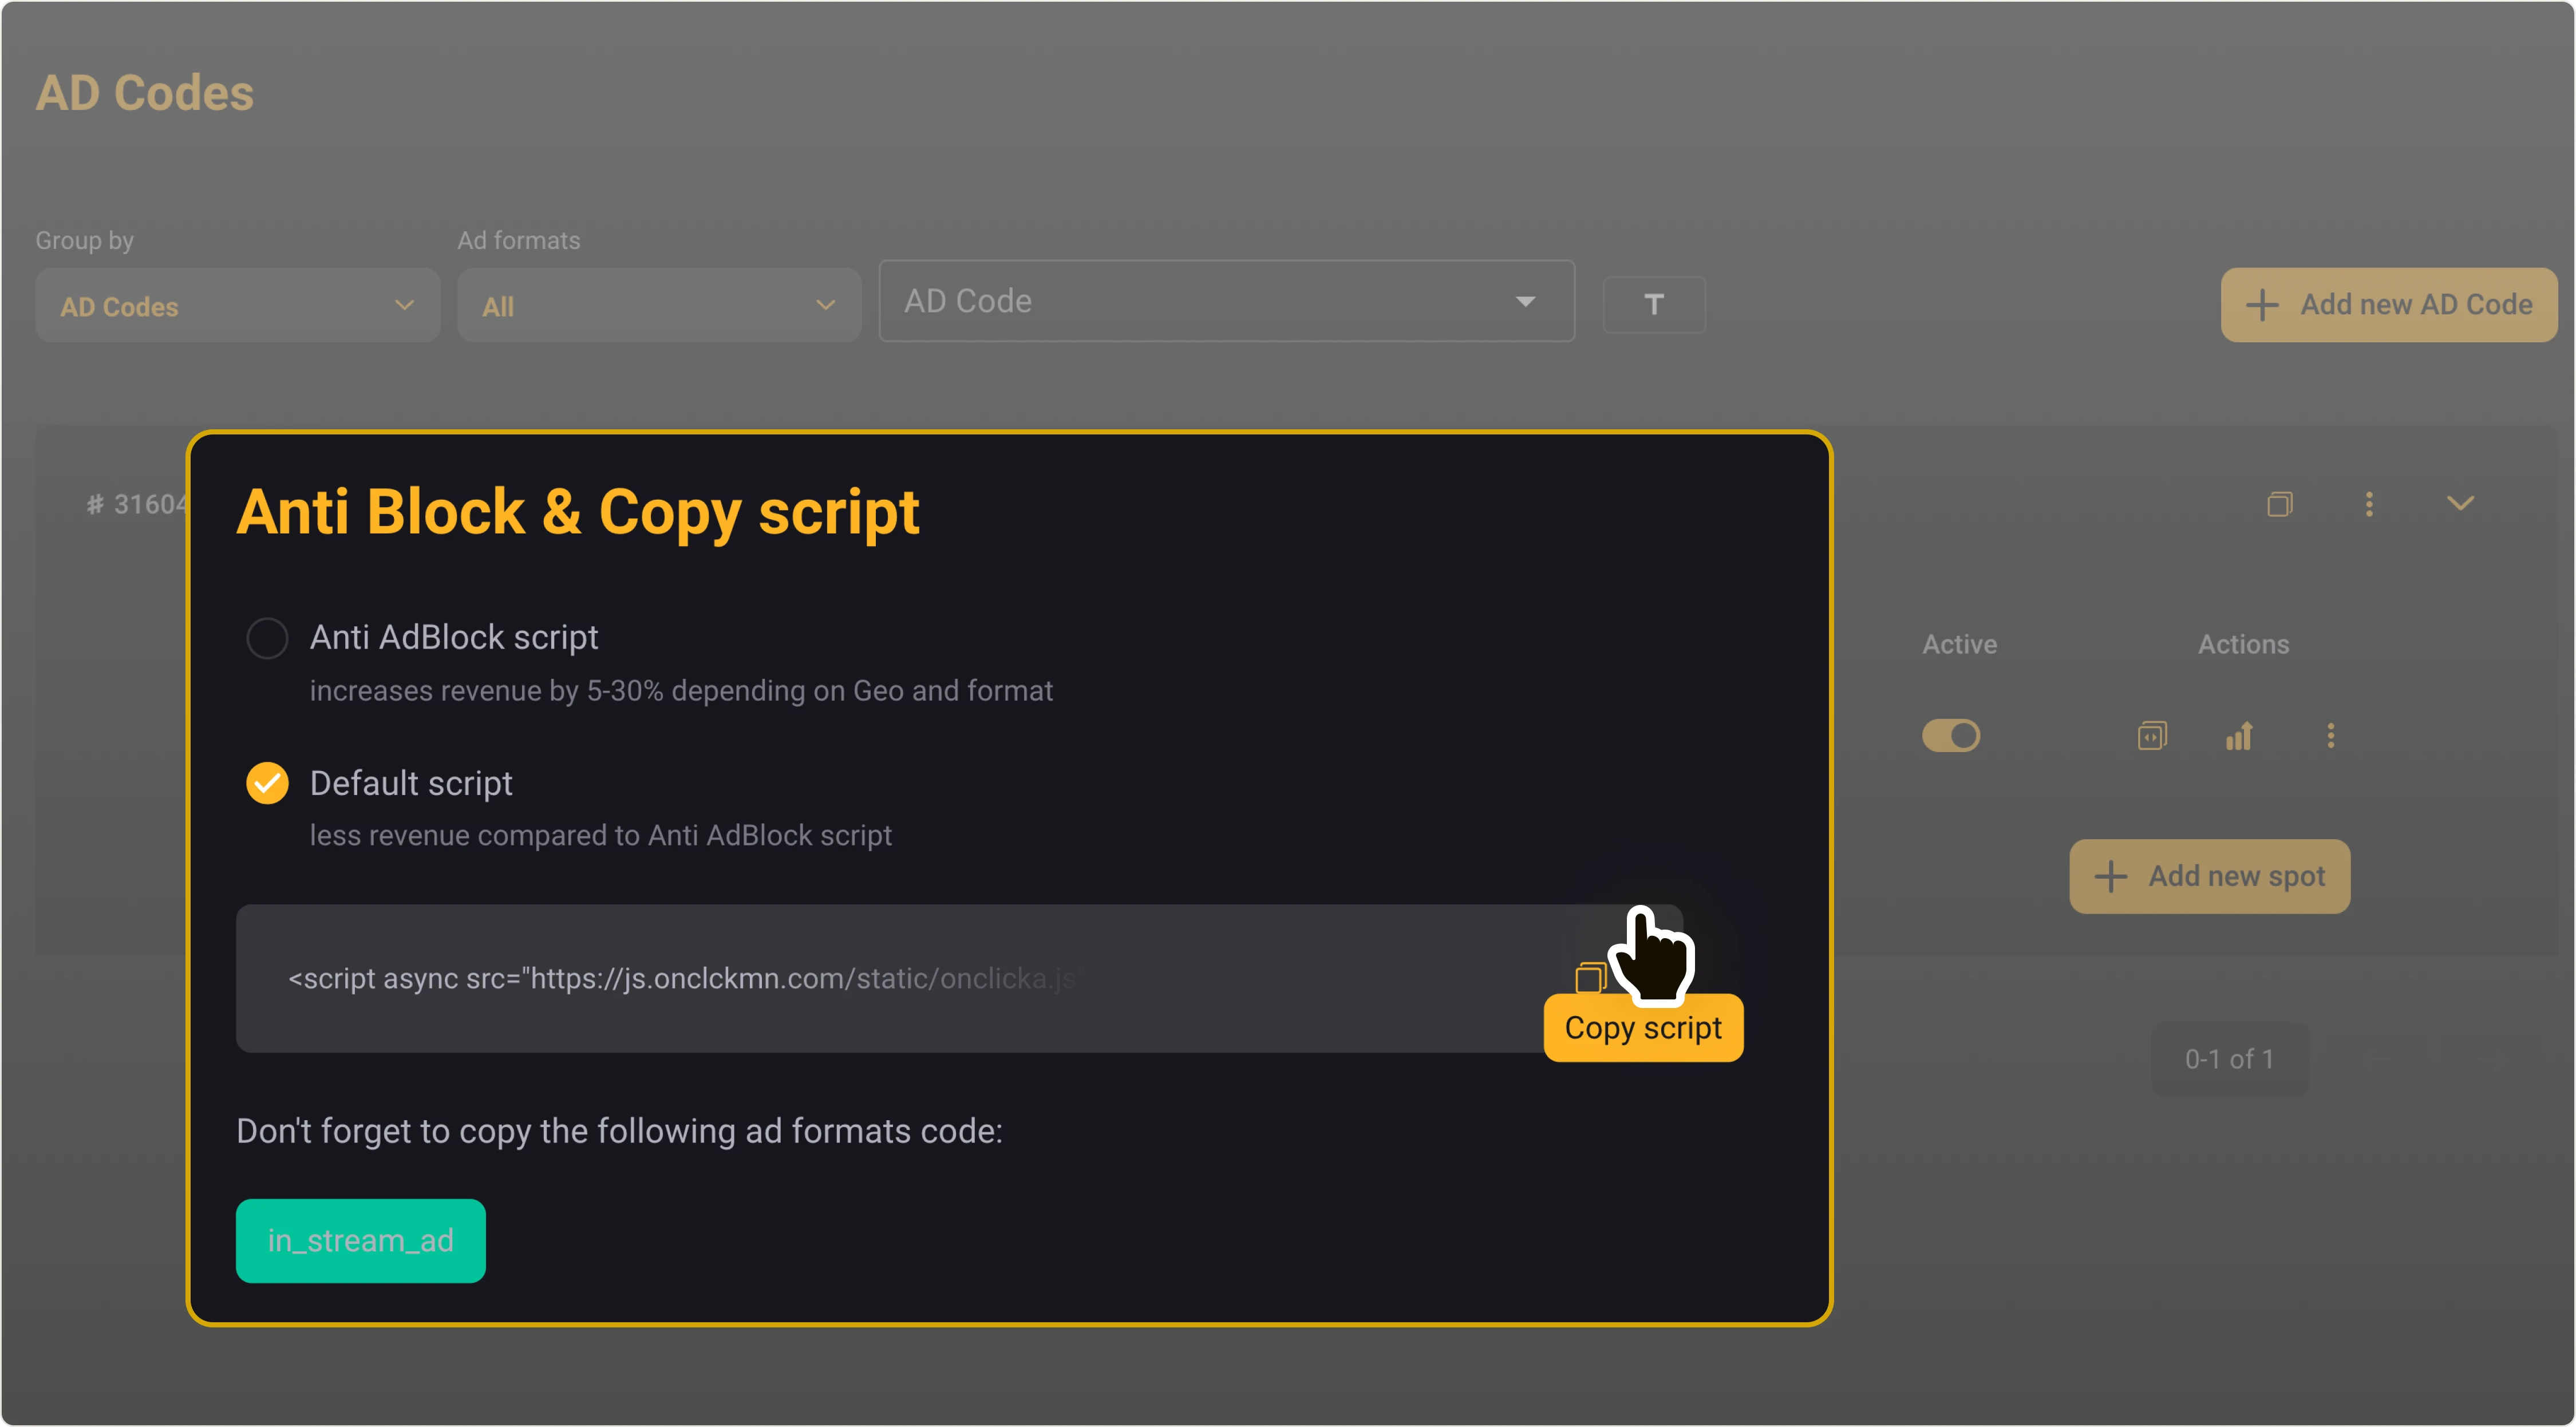
Your script will be copied to clipboard.
Step 5
The script has been copied to the clipboard. This is your AD Code. The next step is to paste it into your website’s code. You can just insert the AD Code to the <head> or <body> of your website.
We recommend integrating the AD Code into the head section. This will assist in faster ads appearance when loading the web page.
Example:
for <head>
If you decide that inserting the code into the <body> section is more beneficial for your website, we recommend placing it as close to the beginning of your <body> section as possible.
